
Previously on The Hardy Boys: The Hidden Theft: We found the culprit, OR DID WE? Also, I agreed with Frank Hardy about something and now I feel dirty.


We arrive back at Casa Hardy, at what looks like 9 in the morning, but then Joe says that “tomorrow morning”, they’ll go back to Spencer Mansion and “ransack it like nobody’s business.” Later events do seem to confirm that it’s the morning, though, so I guess the Hardys are just planning to fuck around all day, maybe solve the mystery once they’ve had a snack. (Hey, they stayed out until 9 at night. Who can blame them for needing a break?) After all, as Frank says, “The danger’s over! The thief is caught…er…well, the thief is no longer a concern for the purposes of this case.” Heh. Let’s not feel bad about his death or anything.
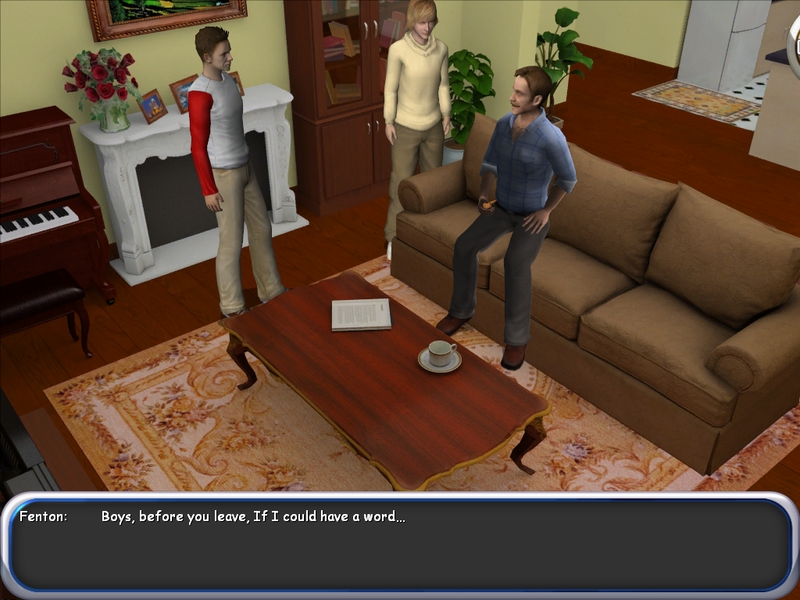
Back in the house, we can finally talk to Fenton in person. Why is his chest so weirdly shadowed? He looks like when you downloaded Sims 2 custom content in 2005 and the mapping was all funky and part of the shoe texture would be somewhere on your Sim’s neck. Good times. Anyway, we chat about the case with Fenton, who reveals that Samuel Spencer was not, in fact, born in New Jersey as he claims. He was born right at Spencer Mansion, which used to be a place called Ingram Sanatorium — which wasn’t like, a bad sanatorium, it was just a “place for people who needed some help getting themselves back on track.” This feels unnecessarily coy. I’ve read Anne of Green Gables, I promise I know what consumption is.
And then, despite saying they were going to go to Spencer Mansion tomorrow morning, we decide we’re actually going to go over there now. Sure. Why not. Except we’re also not going to go over there right now, as Mama Hardy is all mad over us running off to the city yesterday. Fenton suggests we smooth things over by making her “her favorite breakfast. I’m sure she’ll be calmer and more reasonable on a full stomach.” Yeah! Women are so emotional and irrational over things like every other member of your family lying to you and your husband undermining your attempts to parent your children. Anyway: “Seriously?” Joe whines. “We’re in the middle of a case here!” Jesus Christ, Joe, that woman pushed you and your stupid haircut out of her vagina; you can’t make her breakfast?
So off we go to the kitchen, and we leave Fenton on the couch, where he goes back to waving that weird orange thing in his hand back and forth. As…you do?

Conveniently, there’s a recipe for “Mom’s Favorite French Toast” stuck to the side of the fridge, because I guess otherwise the Hardys don’t know their mother’s favorite food. I mean, they’re terrible boyfriends and detectives; I wouldn’t be shocked if they’re mediocre sons, too.

So we have a cooking minigame! It’s pretty easy, you don’t have to measure out the right ingredients or flip the bread or anything — instead, the recipe will tell you which ingredients to grab from the fridge, and making sure you grab the correct items is the most puzzling you have to do. Then you just add them to the bowl, whisk them, use the bread on the batter, and pop it in the stove on medium heat (putting the heat too high or low is also the only other way you can mess up this puzzle).
Before we leave, we should also grab the pocketknife on the kitchen counter, under the bread.

So we give the toast to Mrs. Hardy and all is forgiven. Then she tells us to get out of the house, because she wants to “ravage” the toast and then “ravage” Mr. Hardy. I am baffled as to why this game thinks it needed to reassure us that the Hardy parents fuck. (I’m also, come to think of it, baffled as to why Mrs. Hardy is running around in businesswear. Girl, it’s a Sunday morning. Also you don’t even have a job.)

After that, we can leave the house. Hmm. Well, I don’t really feel any sense of urgency about going to Spencer Mansion, so let’s pop over to the high school first. Phil is still in the computer lab — when we run into him, he tells us that his socks are too tight so he’s removing the elastic to make them looser and achieve the perfect sock:tightness balance. This is so ridiculous that I feel like I surely must be able to say something funny about it, but I can’t. I don’t know. This game is wearing me down. Anyway, the point of this is that we’ll need some elastic for a later task, and we can take Phil’s sock elastics from him now.

With that, we return to Spencer Mansion. The Hardys see Samuel Spencer’s car and note that it has a dent on it that wasn’t there before. When we get closer to the car, we can pull a piece of plaid fabric out of its front bumper. HMMM. We can also open up the hood, and we want to use a knife in our inventory to hack out the timing belt.
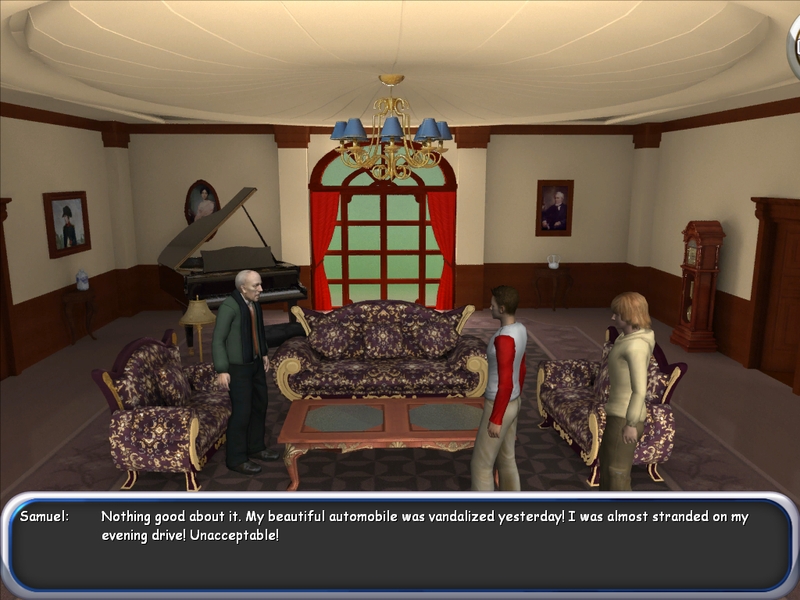
In the house, we run into Sam again and he tells us that his car was “vandalized” yesterday. OR WAS IT?
It is extremely obvious what happened, but the Hardy Boys haven’t quite gotten there yet, because they’re useless. Instead, they ask Sam where he was born, and he tells them he was born in Virginia. We know from Mr. Hardy that Sam was born right here at Spencer Mansion, though! He sits on a throne of lies! Again, however, we can’t go down that line of questioning just yet, so let’s switch gears to telling Sam about Richard Llewellyn. Sam’s like, “Cool, thief caught, case closed” and the Hardys are like, “Okay, but the bonds are still missing,” and Sam’s like, “Whatever, my insurance will handle it. You can stop investigating now!” Hmm, could Sam be suspicious?
Our to-do list will suggest that we go over to the high school and talk to Iola — presumably to check out the plaid fabric, or perhaps Joe just wants to hit on her — but I’ve already hauled ass all the way over here, so let’s poke around the mansion some more.

Let’s go talk to Lily’s parents. Mary is out of the house, but we can ask Thomas about his and Samuel’s history. Thomas confirms that he and Samuel were born at Spencer Mansion. “Are you joking?!” Frank gasps. Frank, we already know this. You know, when Mr. Hardy told us about it like half an hour ago? I swear. Anyway, Thomas confirms that “Ingram Sanitarium” was in fact named after their father, Orin Ingram Spencer, who was the founder of the hospital. The hospital burned down many years ago (sPoOoOkY) and neither Orin or Samuel ever quite recovered from the shame of it all.
Anyway! Frank also wants to know where Lily is. Frank, can you focus? Thomas says that she’s at the local coffee shop, “Mug Shots” (okay, I enjoyed that one), so we’ll have to swing by and see her later.

There’s nothing else of import to discuss with Thomas, so we leave and poke around the grounds some more. We eventually come across Mary at the nurses’ station, where she’s crying over the cross in the ground and leaves a flower on it. I’m confused as to how she was apparently able to waltz over here without her wheelchair? I mean, even if she’s not totally dependent on it, I feel like trolling halfway across the mansion grounds is quite a distance to go without any help. Whatever. Anyway, the Hardys are confused as to why Mary’s having emotions over the nurses’ station, so let’s follow her back to the house and confront her.

Mary shoos Thomas out of the room and reveals all: she’s Richard Llewellyn’s mother. Her parents worked at Ingram Sanatorium jk we’re calling it Ingram Asylum now, and she grew up with the Spencers and Dougal Siepp. She kind of skates over what Dougal Siepp was doing there (we later find out he was a patient), and anyway, she and Dougal used to be a thing, then they moved away and grew apart, then they ran into each other one night and “Richard was the result.” Ew.
Anyway, Mary reveals that her parents died in a fire that burned down Ingram Asylum. The fire was ruled an accident, but Mary knows it wasn’t! It was set on purpose by Samuel Spencer! The Hardy Boys are like, “Wow, that’s crazy” in the least enthused voices ever. Guys!! This is the big twist of the game!! Let’s act like these sentences end in exclamation points, shall we? Mary goes on to reveal that she originally married Thomas to get close to Samuel in order to get some kind of unspecified revenge (ooh, I get to use the “revenge!” tag), but then she fell in love for real, although she hasn’t revealed her true identity to either of them. Anyway, marrying Thomas apparently caused Mary to get over most of her anger at the Spencers, but she’d already spent the first like 25 years of Richard’s life telling him how much they suck, so Richard decided to get revenge anyway. Mary called Dougal to town to try and stop Richard, which I guess Dougal interpreted as “get a haircut and bounce.”
Mary wibbles that she doesn’t care about revenge anymore — she just wants to live a quiet life with Thomas and Lily. Yeah, speaking of, how does Lily come into this? Is Dougal her dad, too? Does she know about Richard’s existence?
Haha, let’s not make Mary answer for her embarrassing life decisions or anything. Instead, our conversation with her ends there. She gives us a letter Richard wrote her, confessing to the theft, which also has some cryptic hints that we’ll need to solve a puzzle later.

Let’s go talk to Lily! We rock up and the first thing out of Frank’s mouth is, “Your mother told me about your parents. And your brother,” presumably because he’s trying to impress Nancy by interrogating someone about their family with zero sensitivity. Lily reveals that Dougal is indeed her dad and Richard is her brother, and she’s apparently known this all along. This is weird because Mary’s story makes it sound like she and Dougal had a one night stand or at most a brief fling, but they were together long enough for Dougal to father two kids 5-10 years apart? Lily also makes it sound like Dougal was in her life for the first couple of years, so…were they a normal nuclear family for a while there, then broke up? I don’t know. Can’t say I care enough about Dougal and Mary banging to think that much further about it, either.

Anyway, let’s keep mercilessly poking into Lily’s traumatic past. We ask to borrow her locket, as that’s the object that Richard’s puzzle instructions are meant to be used on. The puzzle is pretty simple: Richard’s confession mentions that Lily’s “right hand, left hand, head and right side” is the key to their past; this obviously corresponds to clicking the right petal, left petal, top, etc. When we’re done, the locket will pop open to reveal a small key.

Per our to-do list, let’s talk to Iola next. We go over to the high school, but she’s not there, so we haul ass back to Mug Shots to find Chet. I remain uncomfortable with how violently orange he is compared to everyone else in the game. Also why is he wearing suspenders over long underwear like that’s a look? Anyway, we tell Chet to ask Iola to meet us at the high school, and now we can drag ourselves back there. Again.

At the school, we give Iola the fabric we found in Samuel’s car bumper, and ask her to analyze it or synthesize it or whatever the fuck she does. Iola analyzes it and says that there’s AB- blood on the fabric — which, as we know, is Dougal and Richard’s blood type. It certainly can’t be a coincidence that Richard was hit by a car, and his conveniently rare blood type has just turned up on Samuel’s car, can it?

Let’s bring our evidence to Chief Ezra. We introduce the topic with Joe just being like, “Evidence”, which I would normally think is bad writing, but we already know that Joe likes a good, nonsensical single-word sentence. We tell him that Mary says Samuel burned down Ingram Asylum all those years ago; Chief Ezra is intrigued but says we’d need more evidence than Mary’s word. We then tell him that we’re pretty sure Samuel killed Richard (who’s his own nephew, for what it’s worth — I didn’t really make that connection when I was playing) and Ezra’s like, “Cool, if you find any more evidence, let me know.” Ezra, do you not wanna like…investigate? Jesus Christ, even the River Heights police arrest their suspects (never mind that said suspect was Nancy and she solved the case from jail and showed up the entire police department — but, like, at least they followed up on having a lead).

Maybe we can go drag Con Riley into doing some work. Let’s go back to the nurses’ station and talk to him, shall we? “I don’t think he’s in the mood to talk,” Frank notes. Yes, Frank, I can tell, because he’s not here. What is happening?

All jokes aside, we do not actually have to talk to anyone further, as discovering the clue about the fire and the truth about Mary will unlock the last location on the grounds, the “West Wing.” A burned-out west wing that has been forbidden to us up until this point! Will we find a singing cartoon chimera there? Throwing “If I Can’t Love Her” onto the soundtrack would vastly improve this game, I must say.

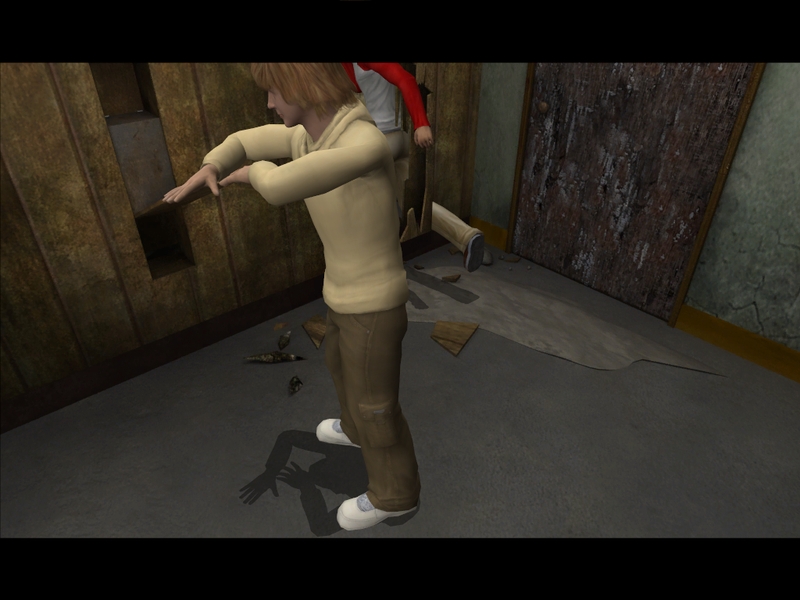
Dig the shadow work on the Hardys here.

In the hallway, we come across this pamphlet, which will get stored in our inventory as “Asylum_Pamphlet” with the caption, “Ingram Asylum Pamphlet! I wonder what’s written on it!” I suppose we should just be grateful that the caption wasn’t “Asylum_Pamphlet! I wonder what’s written on it!” Anyway, the pamphlet details how awesome Ingram Aslyum is and how they feed the patients three whole meals a day and don’t beat them with crowbars. Progress!

So we send the boys through the door (to the left of Joe a couple of images above) and find an abandoned pharmacy. Beyond that is the rest of the asylum, but when we click on the door, Frank says, “I can’t open it.” Because…it’s locked? Come on, guys, you aren’t even trying. So what we want to do is look up and notice the open window above the door, then Joe will climb on Frank’s shoulders. Joe is too small to fit through that window, but we can use the timing belt we stole from Sam’s car on the crank just inside, which will open up the lower window next to the door, and the Hardys can climb through. Er…given that the lower window is half-open already, could they not have just pushed the metal sheet up? I don’t know.

We find ourselves in yet another spooky hallway with yet another spooky locked door. There’s a box off to the side that has a bunch of keys in it, but trickily enough, the key we need is not in it. Instead, we need to look down, where we can see the key in a random hole in the floorboards. The key is too far down for us to reach, but we can attach some gum to a wand the fridge magnet to Phil’s sock elastic to grab it.

Unlocking the door reveals this tiny, creepy room. “The wall just collapsed when I touched it!” Frank gasps, although the wall behind them still looks intact. Ah, well, I already know I expected too much from this game.

So there’s a kind of patchy area in the wall; in order to investigate it, we need to first move the bed, then click on the wall to break it down. (I wonder if Frank’s line about collapsing walls was meant to go here.)
In that room, there’s a funky-looking plank of wood, but clicking on it doesn’t do anything. The solution is this is to separate the Hardys, for the first time since the beginning of the game, then click on the plank. The game will switch to a cutscene, and Joe holds down the plank while Frank walks around to the other side of the wall, where we can see that there’s a compartment. “The Hardys overcome yet again!” Frank says. The compartment has a lockbox labeled “Dougal’s lockbox,” which we use the key from Lily’s locket to open. “That’s thinking outside the box!” Frank says. He’s saying this about…using a key to unlock something? This is why Nancy will never love you.

In the lockbox, we find a letter from Orin Spencer, revealing that Samuel did indeed burn Ingram Asylum down on purpose and then he lied to Orin’s face and was basically chillingly psychopathic about the whole thing. Prior to that, he also spent most of his time bullying Dougal Siepp. Orin beats himself up over how he spent so much time trying to “make the ill well” that he “made the well ill” by neglecting his son. By contrast, we also find Dougal Siepp’s diary, where he’s an unfeeling potential murderer who wants to poison his parents’ tea, then he meets Mary and is like “Omg she’s so beautiful and she told me to take antidepressants, I no longer want to kill people :>”. I’m not sure this game knows how psychopathy works.
(Also, was Thomas just not born when this all went down, or what? He’s not mentioned at all.)

Hey Samuel, we found out you’re an arsonist and a murderer, what’s up! Can we confront him about anything we found? No, no we can’t. All we can do at this point is solve some more puzzles to take us to the end of the game. So! It’s now time to open that puzzle box Dougal Siepp gave us way back in part two. The solution is very boring (you have to click on the box to kind of slide its various panels around and there’s a method to it but I suck at those puzzles so I just cheated like always) and anyway, once you open the box, you get a “push rod.”

You’ll recall the other hint Dougal gave us was “It’s about time”, which is obviously hinting towards the clock in the Spencer Mansion. We use the push rod on the clock, which starts up a puzzle. We just have to place the gears on the clock (they’ll start spinning once they’re in the right positions and are continuously linked to the big gears on each side), and once we’re done, a drawer will pop open with the key to Samuel’s desk. (I guess we’re just doing this with Samuel chilling off to the side, totally uncaring that we’ve uncovered the key that is going to blow all his secrets open.)

Opening up the desk drawer reveals the keys to Samuel’s car, as well as some letters between him and his lawyer. His lawyer is like, “No, you can’t just fake a bond certificate to redeem* the bearer bonds. That would be illegal.” Then, “I don’t think jamming a law degree anywhere would get you the money you so desperately desire. And it would hurt.” Hee. Of course, then the next letter is the lawyer being like, “Okay, 10% was a little low, but 15% seems fair given that we’re doing something totally illegal. I’ll start drawing up those super illegal forms right away!” I feel like either this dude wants Samuel to get caught or he’s not a very good lawyer to be putting this all in writing.
* I’m not totally sure if Samuel’s trying to fake a certificate to redeem the bearer bonds or file some kind of fraudulent insurance claim for them. The latter would be weird because, like, they were stolen — although the lawyer seems to be saying that a successful claim would rely on getting the bonds back and convicting the thief.

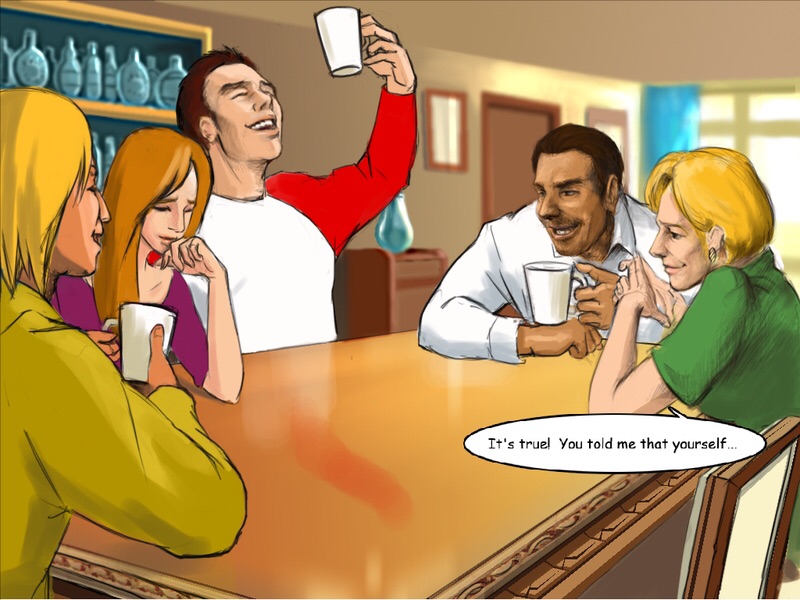
Let’s call Nancy. This is the point where the culprit pops up and tries to kill us, right? I feel like she’d have some good advice. Nancy picks up and teases the Hardys for calling her so often: “Do you guys have a crush on me or something!” “Not anymore — I mean — you wish, lady!” Frank bleats. Frank, I swear to God. There is a murdering arsonist outside, can you focus? Nancy advises us not to let Samuel know that we’re onto him. Presumably she knows this is a bad idea because of all the times she’s let the culprit just follow her to the treasure. Apart from that, no one else has much to say — we can banter a bit further with Nancy; Fenton will advise us to look for a secondary crime if we can’t nail Samuel for killing Richard Llewellyn (presumably the letters re: insurance fraud that we just found); and Mama Hardy will just snark that she has plenty of chores ready for when they get home. Yeah, clean your room, Hardys!

We use the car key to unlock Samuel’s car, where we find a receipt for the New Jersey turnpike. Heh. Props to the presumably-Austrian writers for realizing the the Jersey turnpike has been many a person’s downfall. (He could’ve totally gotten away with this murder if he’d crossed the California-Oregon border, just saying. Unless he was carrying illegal fruit into California.) We then bring all of our evidence to Chief Ezra: Orin’s letter, proving that Samuel burned down the asylum; the toll receipt, proving he was in New York the night Richard was killed; and the letters between him and his lawyer, which the Hardy say prove he was planning to commit insurance fraud, as the bonds were destroyed in the original fire, so the safe has been empty all along. It has? I just went back and looked at my screencaps, plus watched some walkthroughs, and at no point in our conversion with Richard or in his confession or in Orin’s letter does it mention that the bonds were lost. Whatever.
Chief Ezra finally decides to arrest Samuel. “He’s been lucky for far too long!” Frank: “…but his luck has just run out?” Chief Ezra: “I thought about saying that for a moment, but the urge passed. Just as well — it sounded pretty darn silly.” HA! Burn, Frank Hardy.

That’s the end of everything we can do ourselves — giving Chief Ezra the evidence will start a cutscene in a similar style to the start of the game. The Hardys and Chief Ezra race to Spencer Mansion, where Samuel is trying to make his getaway. They chase him down in the police car; you’ll recall that we cut the timing belt on Samuel’s car, so he doesn’t get very far, and the Hardys jump out to confront him. We recap the mystery once again: Samuel knew all along that the safe didn’t contain the bearer bonds, but it did contain Orin Spencer’s letter saying that Samuel burned down the asylum. (It did? We found that letter in a lockbox in the west wing, and at no point did Richard mention he put it there.) Richard was going to blackmail Samuel over the arson, so Samuel killed him. Weirdly, Samuel says he feels guilty over the fire — so I guess he’s just a garden-variety murderer, not exactly a remorseless serial killer. Anyway, then Frank and Joe hit him with yet another twist, which is that Samuel wouldn’t have been charged for the asylum fire anyway, as he was a minor at the time, so there was really no need to do literally any of this to prevent Orin’s letter from getting out. Er…I’m not sure that’s true? I can’t tell if they mean Samuel wouldn’t have gotten into trouble at the time (which isn’t true, he could’ve gotten sent to juvie or tried as an adult) or if he wouldn’t be in trouble now (also possibly not true, depending on how a judge sees it).
Anyway. Samuel is arrested, and we close out with the Hardys having a chat with Thomas, Mary, and Lily. They’re planning to move out of Spencer Mansion, but not too far away — after all, they need to stay close enough for Frank and Lily to see each other! Har har har! And that’s how the game ends.
I didn’t hate this game — it’s fun enough to play, and the middle bit in New York where you investigate Dougal and trace Richard to the hospital is actually pretty fun and creepy. It was also nice to have the Hardys’ book friends be more involved than Nancy’s friends are in her games, Chet’s terrifying tan notwithstanding. It was nice to see Iola have an active role, since she gets killed off immediately in Files and doesn’t have much of a character in any of the other series — although her inclusion once again makes me question why Hardy Boys adaptations are so allergic to properly including Callie Shaw. I don’t know, I have a soft spot for Callie — she’s a total nothing character in all of the canon series apart from Files, and in fanfic (lol) she basically just exists to get dumped or cheated on by Frank, so I’m always hoping to see her appear as a real, sympathetic character.
Anyway, lest you think I am unreservedly complimenting the Hardy Boys, I will add that this game still isn’t great. The graphics are jank; the puzzles are okay but completely drop off by the third act, so you don’t build much tension towards the end; the mystery has some small details that don’t add up, like Orin’s letter being in the safe, and it’s overall a little odd, tonally. It starts out as a theft, then it starts getting kind of weird and conspiratorial with the Hardys finding out from Dougal Siepp that All Is Not As It Seems, then it starts verging into wannabe horror territory with burned-out hospitals and psychopathic escapees. Once you solve the case, the beginning premise of ATAC wanting us to look into it (on Thomas’s behalf? On Samuel’s?) also totally stops making sense.
Still, you know, this game is decent, which puts it way above a lot of other bland, hidden-object mystery games, and it’s not like I ever expected more than mediocrity from the Hardy Boys anyway.
THE END.
Leave a Reply